After one thousand and one blog posts about referral marketing here in Viral Loops, we believe we have already established how vital referral marketing is for your user acquisition and marketing campaigns.
We want to make sure that you can use Viral Loops everywhere – using our Landing Page, a Shopify Store, and of course, any WordPress website in the world.
If you’ve been living in a cave for the past decade and a half, WordPress is the most popular Content Management System (CMS) for building websites and blogs across the Internet (36.28 % of Top 1M sites).
This doesn’t come as a surprise as WordPress is an open-source project which is super user-friendly, feature-rich, and supported by a community of hundreds of thousands of web developers.
In this full-guide, we’re going to show you how you can run a Viral Loops campaign from your WordPress website.

Why you need a prelaunch campaign.
I used to think that the sole purpose of a prelaunch campaign is to gather leads for an upcoming project. While this is partially true, there’s more into it.
Overall, a prelaunch campaign allows you to expand on three verticals:
- Gather leads.
- Test the market for interest in your product/service.
- Gather feedback from early adopters.
Gathering feedback from early adopters is an often overlooked aspect of prelaunch campaigns, as most of us are obsessed with hitting quantitative goals.
If you want to get an in-depth look at how you can use your early adopters to gather valuable feedback, you should take a look at our dedicated article.
A product prelaunch is much more than getting early adopters.
Overall, the process is simple; You gather a list of early adopters, you segment this list, and then you interview people. These interviews will provide you with info that will help you in your product development process and ensure that you’ll build something that people want and understand how to use.
Things you must decide before your campaign.
Recently I was watching a video by Tim Ferris about journaling. He said that one of the things he learned over the years is that complexity fails.
There are two ways to avoid complexity:
- You can make things extremely simple.
- You can schedule/plan things ahead of time.
But why pick one over the other? You should aim for both.
Your prelaunch campaign should be simple enough to require as little resources as possible, and you’ll plan things so you can avoid friction and miscommunication.
If you’re feeling overwhelmed about coming up with tasks, you don’t have to worry that much. I’ve listed the basics for you:
- Decide your main message.
- Prepare and educate your team.
- Set up your campaign’s goals and metrics.
- Define a time frame for your campaign.
To decide your campaign’s main message, I propose to give a good look at what your competitors do. There may be somebody else out there that built a product similar to yours that has already done enough research about it.
I don’t say by any means to copy what other people do, but you have the opportunity to learn a bit about the language that your competitors use, and also come up with a market gap that you can fill with your product.
About the time frame of your campaign, I know when starting up, there’s a desire to launch it ASAP. I strongly advise against rushing things. You need enough time to gather an initial set of leads and gather feedback.
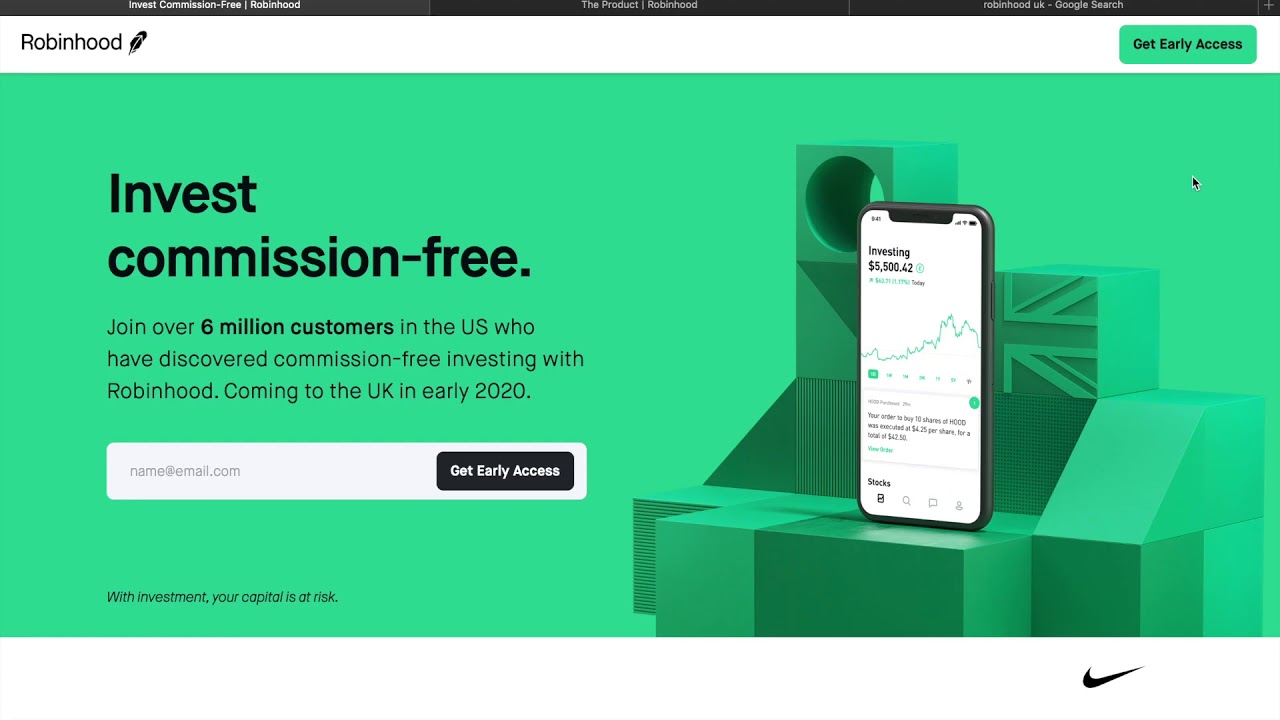
Robinhood, for example, run their prelaunch campaign for over a year to gather 1M users.
If you want to learn more about prelaunch campaigns, the only thing you have to do is to read our huge guide.
After planning your prelaunch campaign, it’s time to build it inside your WordPress site. Let’s see how you can do it using Viral Loops in 4 steps.
The Milestone Referral Template + WordPress= <3
Step 1
Create your campaign in the Viral Loops app. Follow the campaign wizard steps and edit all your campaign settings up to the Installation step.
We’re going to showcase our guide using the Milestone Referral Template, but the process is precisely the same for all our referral marketing Templates.

Step 2
Click on the “I’ll do it myself” option.
In the following steps, you are going to add some code on your WordPress pages. Keep in mind that the code needs to be on the same page (URL) that you have submitted on the Info step of the campaign wizard.
Step 3
All of a sudden, lines of codes start popping everywhere.

Don’t panic! Let me tell you what this precious code does for your campaign.
- The first big part is the one that helps us connect your WordPress website with Viral Loops. It is essential for campaign tracking, and nothing else would work if this chunk is missing.
- The smaller parts are for the widgets that you’re going to embed on your page (Form Widget, Milestone Widget, Referral Count Widget).
Step 4
You can place the campaign JavaScript snippet in your theme’s code or as part of your campaign page in WordPress (both in Gutenberg and in Classic Editor). This should be placed last relatively to the other widget codes.
If you need any help with this part, please refer to our dedicated Help Center documentation.
However, your widget code should be added directly to your editor.
On Gutenberg Editor, you can add your widget as an HTML code using a dedicated HTML Block.

On Classic Editor, you would need to switch from the “Visual” to the “Text” tab of your editor and place your respective HTML widget code exactly where you need it to be.
In the case you’re using a Page Builder plugin such as Elementor or WPBakery, there are Custom HTML block options for them as well.
Before you go.
Share a comment with your campaign page in WordPress for everyone to see here! We will upvote and comment on all your submissions, so keep them coming!
And don’t forget, one of our Sales Representatives is always available to book a demo for you.