In a digital marketplace where thousands of new online stores launch daily, starting without pre-built anticipation is like opening a physical store without telling anyone.
You might get some walk-by traffic, but you’re missing the opportunity for opening day lines around the block.
The prelaunch phase creates the foundation for both your initial sales and long-term growth.
This is a common prelaunch problem that can be addressed by using ads for Shopify store.
But before exploring specific advertising strategies, let’s understand why prelaunch advertising has become crucial for successful store launches in today’s competitive e-commerce landscape.
Consider these compelling prelaunch marketing statistics:
-
Stores with strategic prelaunch campaigns see 4X higher first-month sales
-
Prelaunch email list subscribers convert at 3X the rate of cold traffic
-
72% of successful Shopify stores cite prelaunch marketing as critical to their growth
-
Referral program participants have 2X higher lifetime value than non-referred customers
These numbers reveal why Shopify merchants across industries now consider prelaunch advertising essential rather than optional.
However, few execute it as strategically as they could, leaving significant growth potential on the table when running ads for Shopify store promotions.
The Strategic Advertising Framework
The most successful Shopify store launches treat prelaunch advertising as a comprehensive ad campaign requiring its own strategy.
This foundation-building phase typically spans 4-6 months, providing sufficient time to test different advertising approaches and build substantial audiences while gathering valuable store data.
Your prelaunch advertising strategy should follow this proven framework:
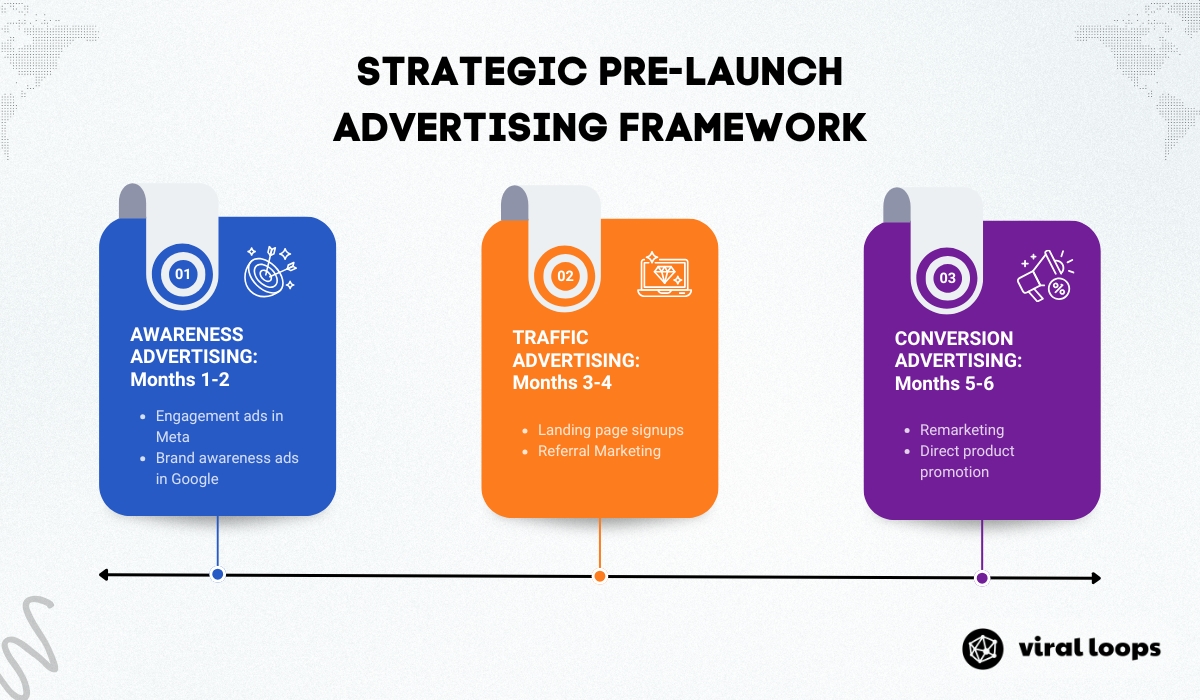
- Phase 1 (Months 1-2): Awareness Advertising – Focus 60% of your budget on Meta engagement ads and initial Google Ads campaigns to build brand recognition and social proof.
- Phase 2 (Months 3-4): Traffic Advertising – Shift 70% of your budget toward Meta traffic ads and Google Ads search campaigns to drive landing page signups and promote referral program.
- Phase 3 (Months 5-6): Conversion Advertising – Allocate 50% to remarketing while maintaining core campaigns to maximize conversions before launch.
Many store owners make the critical mistake of expecting organic reach alone to drive results.
Search engines severely limit unpaid content visibility, making strategic paid advertising necessary for meaningful prelaunch momentum.
Rather than relying solely on free posts, successful campaigns combine organic content with targeted advertising across multiple channels.
The prelaunch period demands active management rather than passive observation.
Regular analytics reviews identify what works and what needs adjustment, with small tweaks often leading to significant improvements in lead generation and cost efficiency.
This data-driven approach ensures every advertising dollar works harder, setting your online store up for day-one success and helping increase sales from launch.
Meta Advertising: Your First Growth Engine
Meta platforms offer powerful advertising options for Shopify prelaunch campaigns, reaching potential customers where they spend time daily.
The strategic advantage of Meta lies in its unparalleled interest-based targeting combined with massive user reach across Facebook and Instagram.
The Two-Phase Meta Strategy
Rather than running generic ads, top-performing Shopify prelaunch campaigns implement a strategic two-phase approach that builds momentum and converts interest into signups while helping merchants manage their advertising efforts effectively.
Phase 1: Engagement Ads for Social Proof (20% of budget)
Engagement ads generate likes, comments, and shares, creating valuable social proof for new brands. This social validation increases trust among potential customers viewing your prelaunch ad campaign.
When people see others engaging with your content, it signals that your brand is worth their attention and can help drive sales.
Here’s the setup process:
-
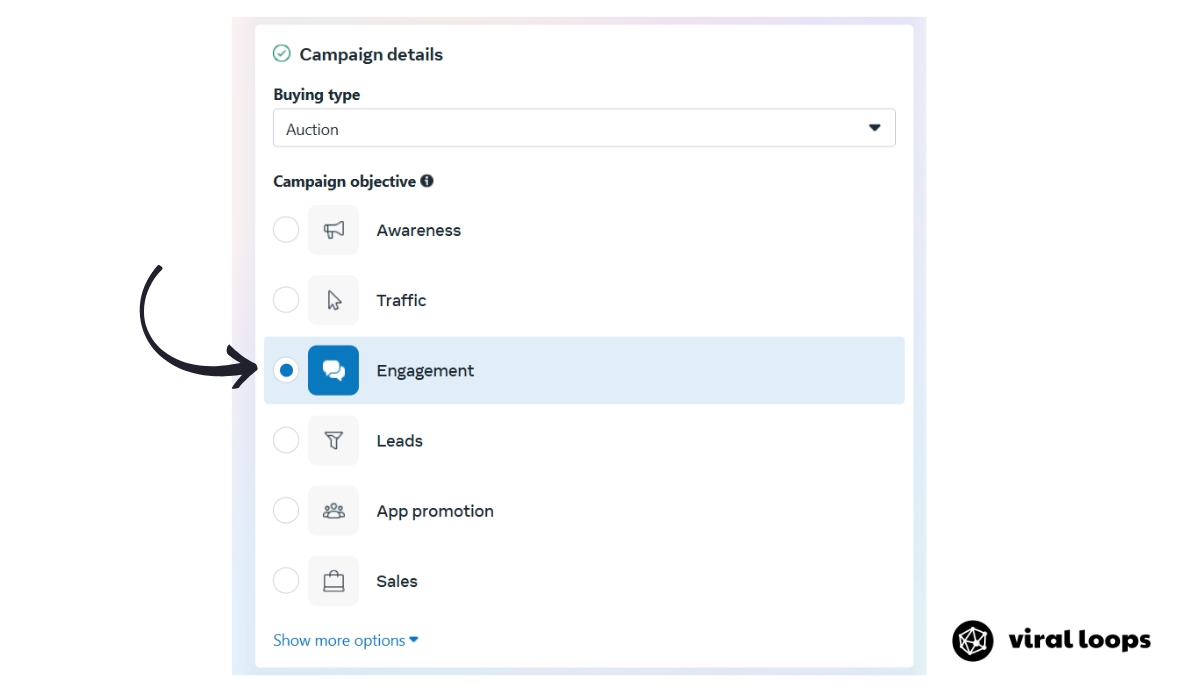
Access Meta Ads Manager and select “Create” to start a new campaign
-
Choose “Engagement” as your campaign objective to optimize for interactions
-
Set a daily budget around 20% of your total prelaunch advertising allocation
-
Define your target audience
-
Select placements focused on Facebook and Instagram feeds and stories
-
Upload eye-catching creative that encourages comments and sharing
-
Write copy that asks questions or prompts audience interaction
-
Add compelling visuals that make key points stand out
The primary goal extends beyond collecting likes—engagement ads build buzz that makes your brand appear established and trusted.
This creates a halo effect (positive association that improves overall brand perception) that makes all your other advertising more effective and helps attract more customers.
Focus your engagement ads on content that naturally encourages interaction: behind-the-scenes product development, polls about features, or questions about customer preferences. Avoid overly promotional content during this phase.
Phase 2: Traffic Ads for Conversion (65-70% of budget)
Once you’ve established initial social proof, traffic ads direct potential customers to your prelaunch landing page where they can sign up.
This phase focuses on converting interest into concrete leads for your upcoming online store launch and helps generate more sales potential.
The ad campaign structure follows this proven formula:
-
Choose “Traffic” as your campaign objective to optimize for landing page visits
-
Enable campaign budget optimization and set your daily budget spending limit
-
Define location targeting based on countries your business will serve
-
Set age range, language, and gender parameters for your target audience
-
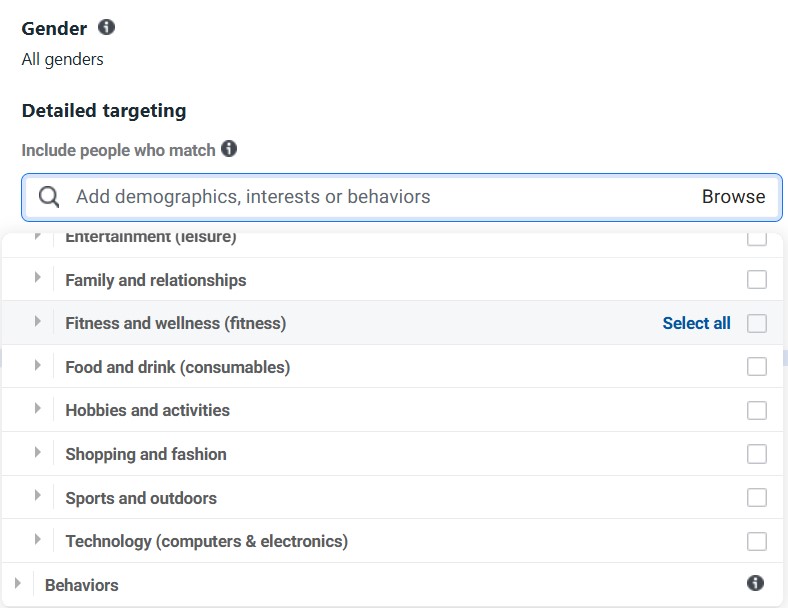
Add 6-10 related interests in the detailed targeting section
-
Select Facebook and Instagram feeds/stories as primary placements
-
Upload simple, clear creative that communicates your prelaunch value proposition
-
Write direct copy that explains what visitors gain by signing up
-
Include a strong call-to-action that creates urgency or exclusivity
Your landing page must deliver on the ad’s promise with a simple signup process. Test different creative variations to identify what resonates best with potential customers.
Most successful prelaunch campaigns test 3-5 different ad creatives simultaneously, then allocate more budget toward the highest-performing versions.
Mobile-First Creative Strategy
Since up to 63% of Meta traffic comes from mobile devices, design your ad creative with smartphones in mind. Use bold, clear visuals that remain compelling even on small screens.
Keep text overlays minimal and ensure your call-to-action buttons are easily tappable.
Video content often outperforms static images on Meta platforms, especially for prelaunch campaigns.
Short videos showing product development progress, team introductions, or sneak peeks generate higher engagement rates than traditional product photos and help promote your upcoming launch more effectively.
The Remarketing Advantage: Capturing the 97%
Remarketing represents one of the most overlooked opportunities in prelaunch campaigns.
Studies show that only 3% of first-time website visitors take action, making retargeting ads essential for capturing the remaining 97% of potential customers who showed initial interest.
Creating Your Remarketing Machine
Remarketing campaigns target individuals who visited your prelaunch landing page but didn’t sign up.
These visitors have already demonstrated interest in your upcoming store, making them valuable prospects worth pursuing with targeted follow-up advertising that can help boost conversions.
The implementation follows these strategic steps:
-
Install the Meta Pixel on your Shopify store through the Online Store Preferences using the appropriate app and select your sharing preference (conservative, enhanced, maximum)
![]()
-
Create a custom audience of people who visited your prelaunch page
-
Set the timeframe for visitor history (30-60 days recommended for prelaunch)
-
Create a new ad campaign using “Traffic” as the objective
-
Select your custom audience in the targeting section
-
Develop ads that address common objections or add new incentives
Segmented Remarketing for Better Results
The most effective remarketing campaigns segment visitors based on their behavior rather than treating all non-converters the same.
Different visitor actions warrant unique remarketing approaches:
- Quick Bounce Visitors (under 30 seconds on page) – These people need more compelling reasons to engage. Remarketing ads should focus on stronger value propositions, social proof, or addressing potential concerns about legitimacy.
- Engaged Visitors (2+ minutes on page) – These prospects showed genuine interest but need a gentle push. Remarketing ads can offer limited-time bonuses, exclusive early access, or address specific objections about the signup process.
- Multiple-Visit Visitors – People who returned to your page multiple times are highly interested but need final convincing. These remarketing ads should create urgency with countdown timers or limited availability messaging.
Budget Allocation and Timing
Allocate approximately 10-15% of your total prelaunch advertising budget toward remarketing efforts.
This smaller allocation often generates disproportionately high returns because you’re targeting warm audiences rather than cold prospects, helping you pay less for better-qualified leads.
Time your remarketing campaigns strategically. Begin remarketing ads 3-7 days after someone’s initial visit, when your brand is still fresh in their memory but they’ve had time to consider the decision.
Avoid immediate remarketing, which can feel pushy, and remarketing after 60 days, when interest typically cools significantly.
Cross-Platform Remarketing Strategy
Don’t limit remarketing to just Meta platforms.
Google Ads Display Network offers excellent remarketing opportunities for prelaunch campaigns, often at lower costs than Meta remarketing.
YouTube remarketing can be particularly effective for product-focused businesses, allowing you to show video ads to people who previously visited your landing page.
The key to successful remarketing lies in variety. Create multiple ad creatives and test different approaches—some focused on benefits, others on urgency, and others on social proof.
Monitor which messages resonate best with your remarketing audiences and allocate more budget toward winning combinations using proper bidding strategies.
Remember that remarketing audiences are small but valuable.
Even with modest traffic to your prelaunch page, a well-executed remarketing ad campaign can capture additional signups that significantly impact your launch day success.
Google Ads: Capturing Active Search Intent
While Meta excels at interest-based targeting, Google Ads captures intent-based traffic from people actively searching for solutions.
This powerful combination creates a more robust prelaunch advertising strategy that addresses multiple customer acquisition channels simultaneously and helps merchants reach new customers effectively.
Understanding Intent vs. Interest
The fundamental difference between Google Ads and Meta advertising lies in the user mindset.
Meta users scroll through social feeds and discover your ads within entertainment content.
Google users actively search for specific solutions, making them more likely to convert when they find relevant prelaunch offers.
This intent-based traffic often converts at higher rates but costs more per click than social media advertising.
The key is targeting search terms and keywords that indicate genuine purchase intent rather than just casual browsing.
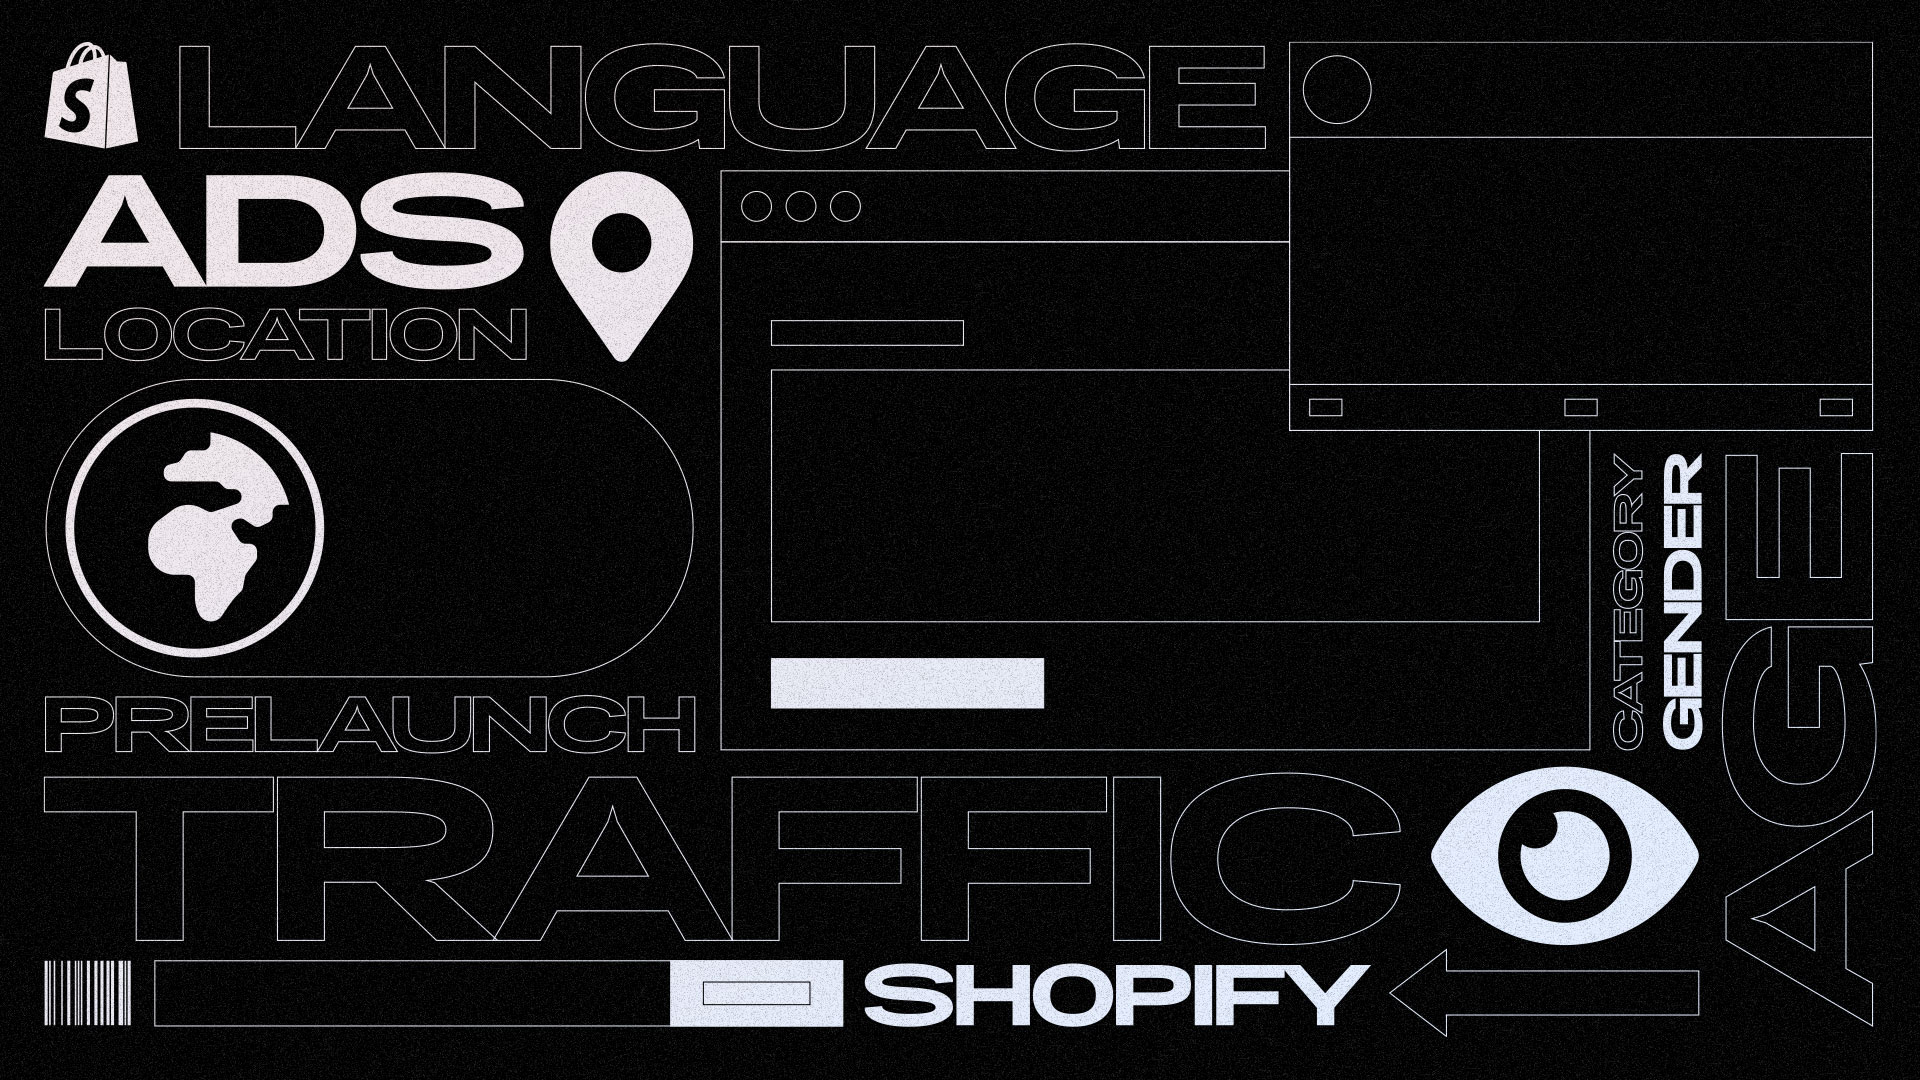
Setting Up Google Ads for Prelaunch Success
Google Ads works differently from social media platforms, focusing on search intent rather than demographic interests.
This approach connects with potential customers actively looking for products like yours using specific search terms and helps you create effective advertising campaigns.
The implementation involves these strategic steps:
-
Install the Google & YouTube app from the Shopify App Store
-
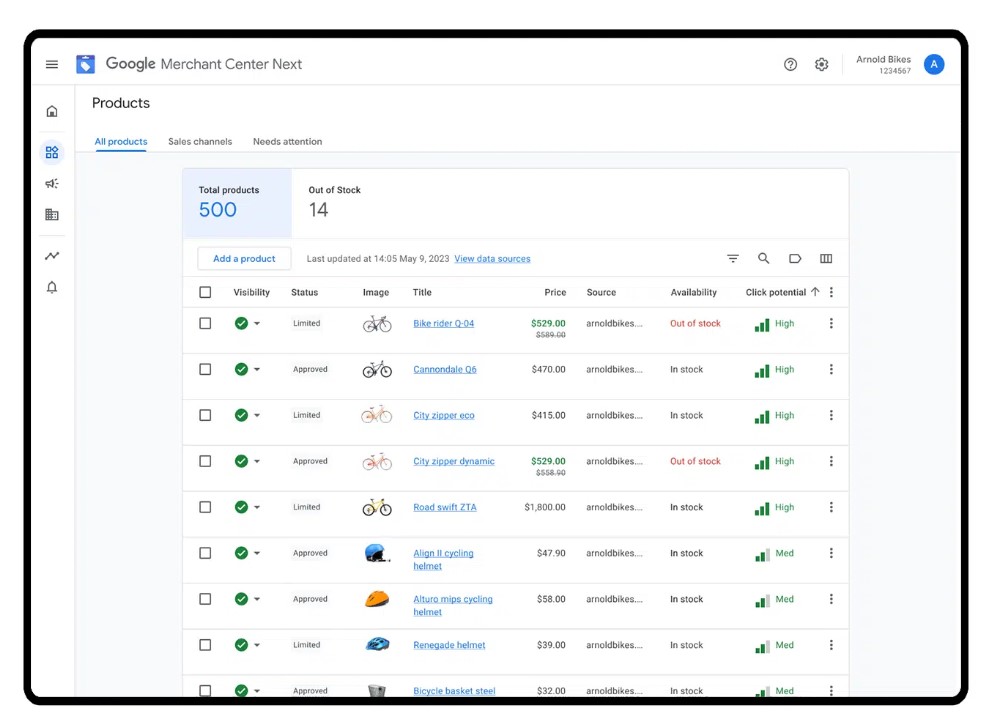
Connect your store to Google Merchant Center Next for future product listings
-
Create a Google Ads account and link it to your Merchant Center
-
Set up a “Website traffic” campaign with “Search” as your campaign type
-
Define your target locations, languages, and budget parameters
-
Create ad groups around key prelaunch themes and product categories
Start with broad match keywords related to your product category, then narrow down based on performance data and optimization insights.
For example, if you’re launching a fitness accessory, begin with terms like “new fitness gear,” “upcoming fitness products,” or “fitness equipment launch.”
Keyword Strategy for Prelaunch Campaigns
Prelaunch campaigns require different keyword strategies than post-launch sales campaigns.
Focus on terms that indicate interest in new products or upcoming launches rather than immediate purchase intent:
- Discovery Keywords – Terms like “new [product category] 2025,” “upcoming [product] releases,” or “best new [category] products”
- Problem-Focused Keywords – Phrases that identify the pain points your product solves, such as “struggling with [problem]” or “need better [solution]”
- Competitor Keywords – Terms related to established competitors, allowing you to capture users researching alternatives
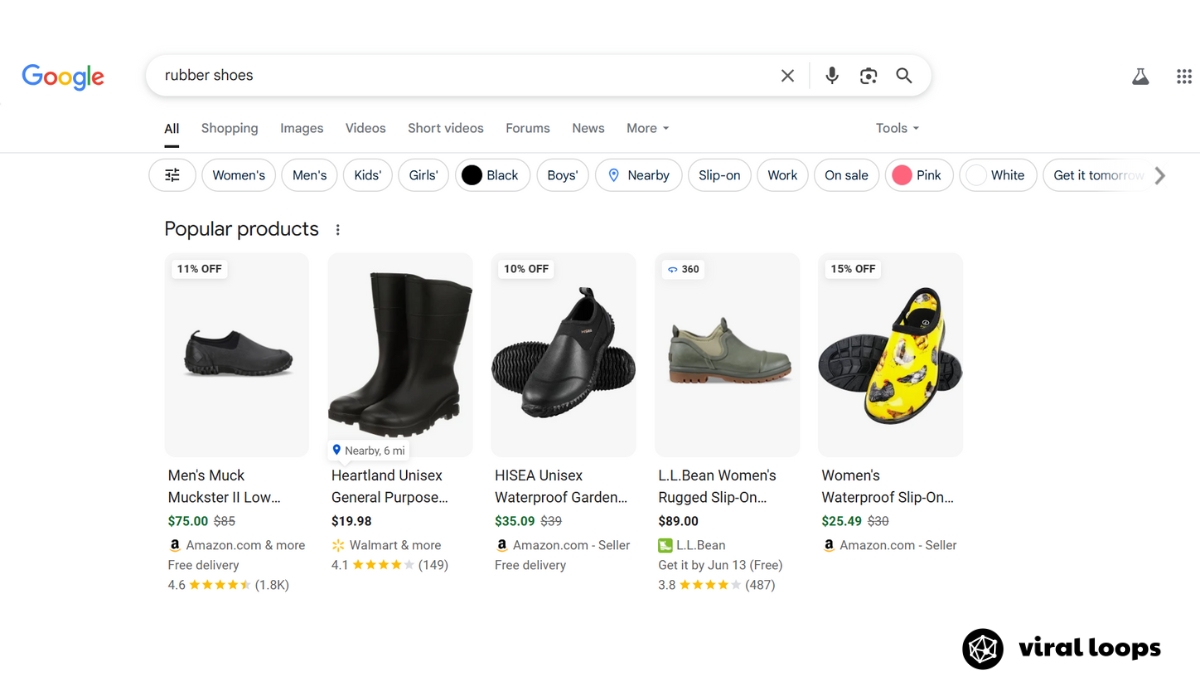
Shopping Ads: Visual Product Promotion
Shopping ads display product images directly in search results, creating visual appeal even during prelaunch.
These ads use your product data to determine when and where they appear, giving you an automated way to reach interested buyers and promote your products directly in search results.
Performance Max campaigns take this further by delivering your Shopping ads across Search, Display, YouTube, Gmail, and Maps automatically.
These campaigns use Google’s machine learning to find the best placements for your prelaunch content across their entire advertising network, helping you optimize performance across multiple platforms.
For prelaunch campaigns, Shopping ads work best when you have product mockups or prototypes to showcase.
Even without final products, compelling visuals can generate interest and drive traffic to your prelaunch landing page while building anticipation for your upcoming store.
Budget Considerations and Timeline
Google Ads typically require higher minimum budgets than Meta advertising to generate meaningful data.
Plan for at least $30-50 per day for search campaigns, with additional budget for Shopping ads if you’re using them. Consider using dynamic bidding strategies to optimize your ad spend automatically.
Begin Google Ads campaigns 2-3 months before your planned launch date. This timing allows enough time to optimize keywords and ad copy while building momentum for launch day.
Google’s machine learning algorithms need sufficient data to optimize performance, making early starts crucial for prelaunch success.
After launch, shift your campaign goals from awareness and signups toward sales and conversions.
This flexibility makes Google Ads a long-term asset that grows with your business beyond the prelaunch phase.
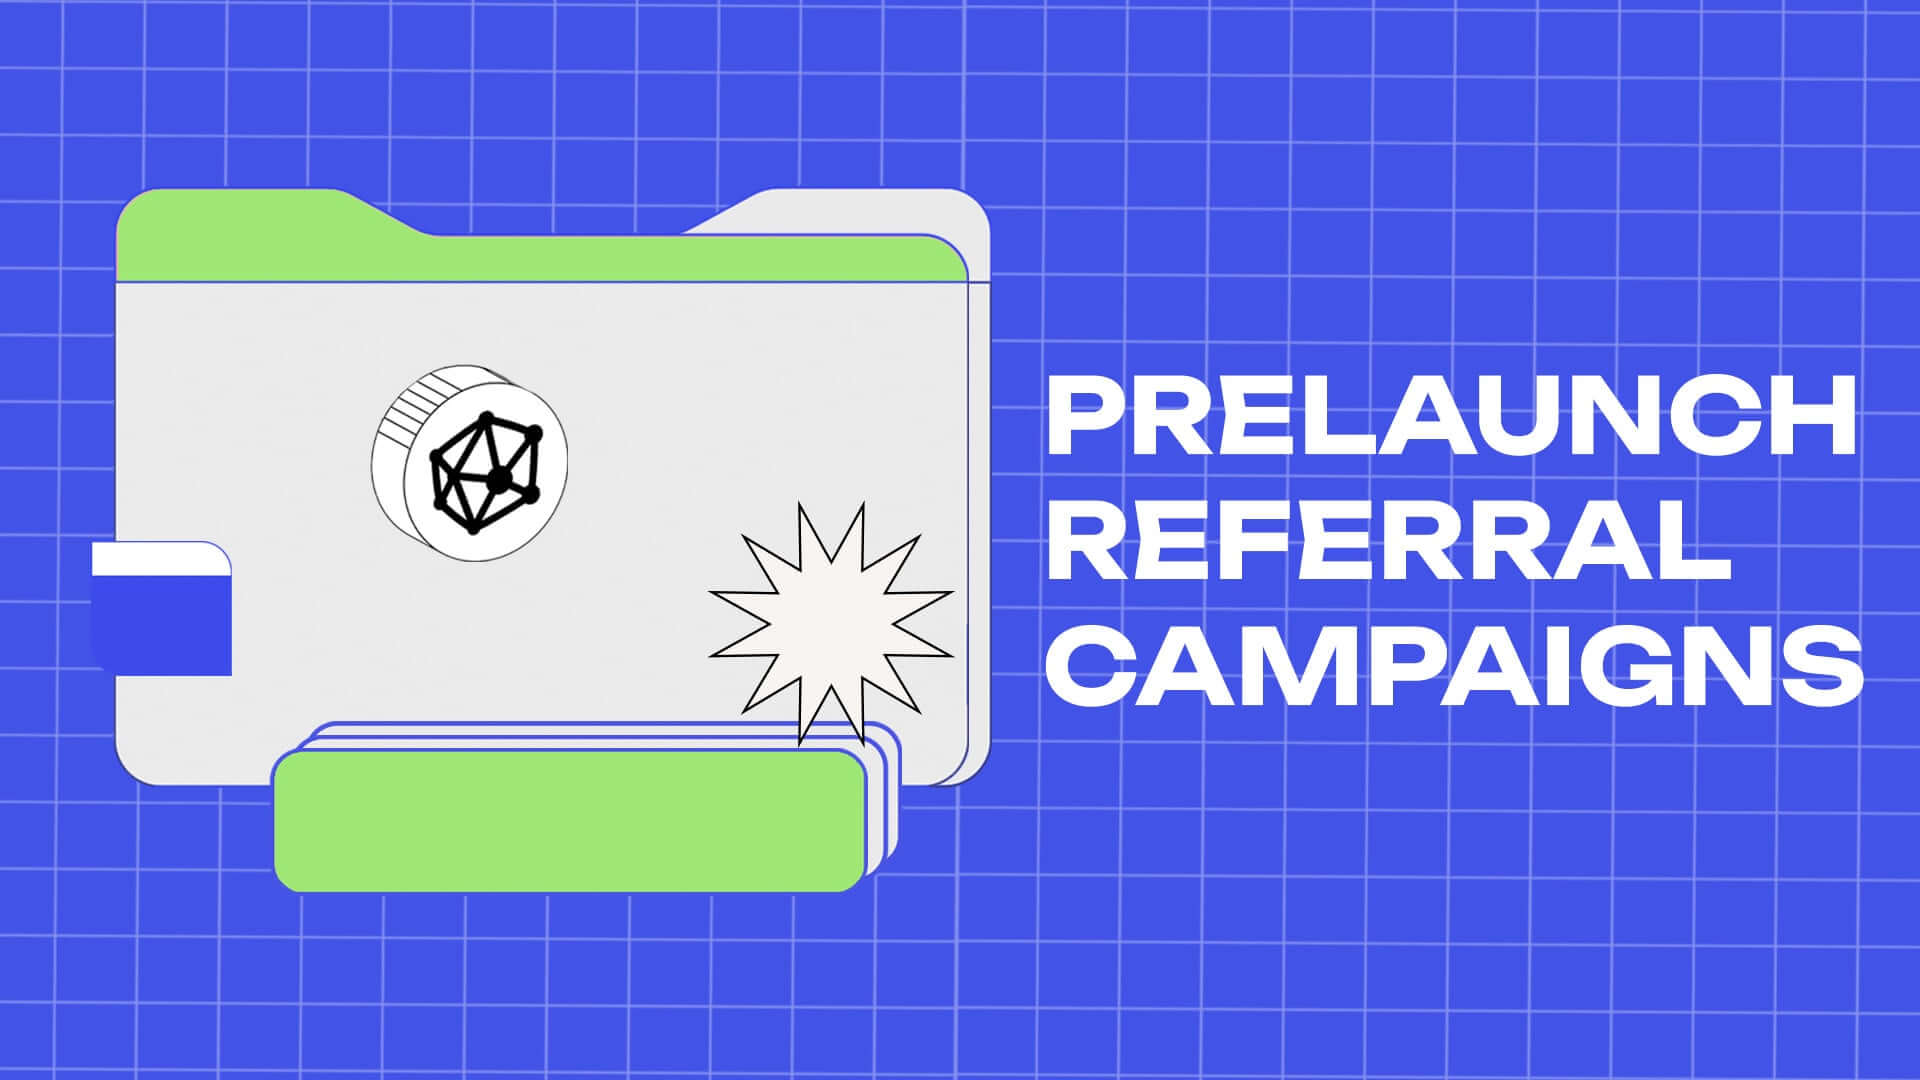
The Referral Marketing Opportunity: Your “Free” Advertising Engine
While paid advertising drives initial traffic, referral marketing creates organic growth through customer recommendations.
Similar to how Dropbox grew by 3900% through their referral program, Shopify prelaunch campaigns can leverage this powerful strategy for more cost-effective customer acquisition than traditional advertising.
Why Referral Marketing Works for Prelaunch
Referral marketing isn’t technically free advertising—you’ll spend on rewards rather than media costs—but it’s typically more cost-effective than traditional ads.
When someone recommends your upcoming store to a friend, that recommendation carries inherent credibility that no advertisement can match and helps you reach new heights in customer acquisition.
The challenge with referral marketing lies in execution complexity.
Manually tracking referrals, calculating rewards, and managing participant communications quickly becomes overwhelming as your program grows.
This is where many prelaunch campaigns struggle to scale their referral efforts effectively.
However, the right referral marketing tool can transform it from a manual headache into an automated growth engine.
Modern referral platforms handle the technical complexity while you focus on creating compelling incentives that drive genuine sharing and help merchants manage their programs efficiently.
Launching Your Referral Campaign
Start your referral program 2-3 months before launch, giving participants time to share and build momentum.
Begin with your most engaged email subscribers and social media followers—these early supporters are most likely to actively participate and share.
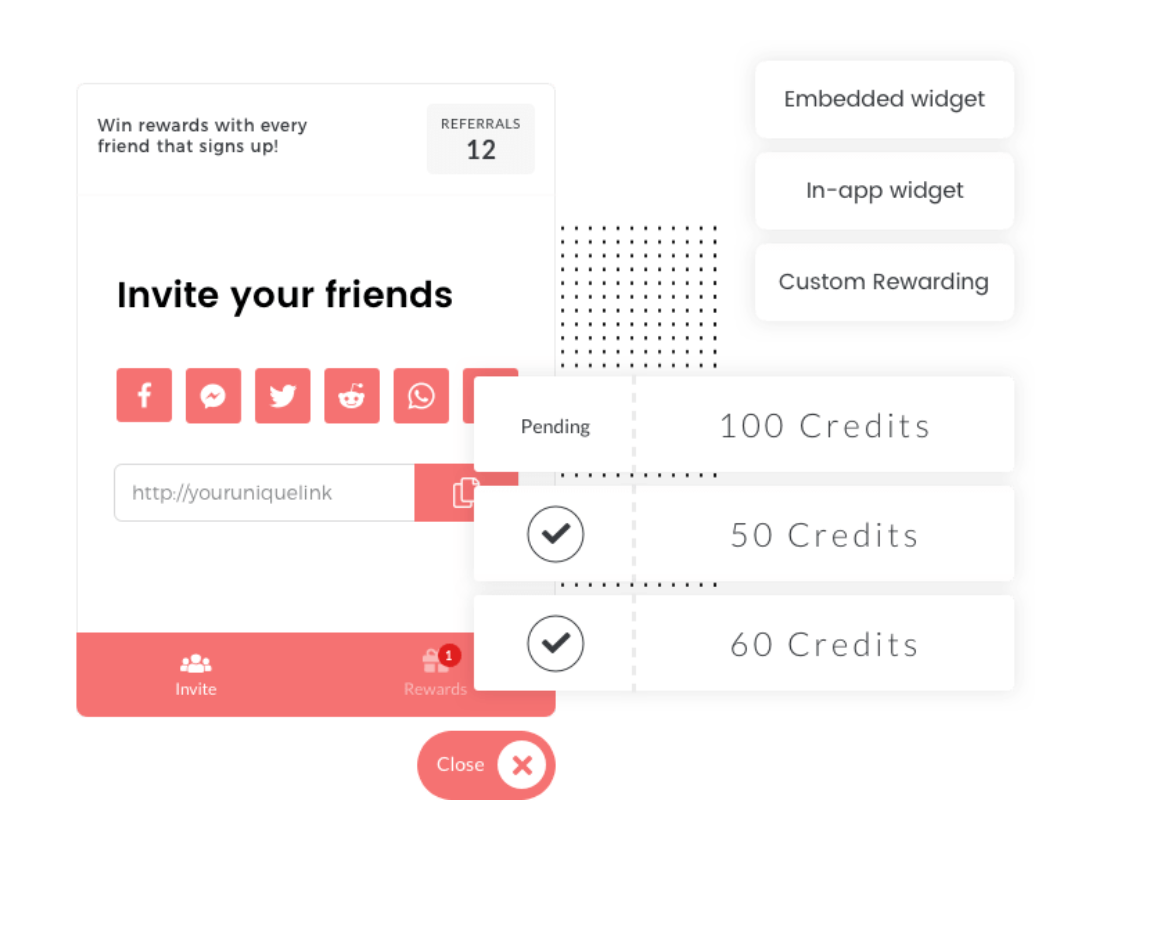
Create simple sharing tools that make participation effortless. Pre-written social media posts, email marketing campaigns templates, and eye-catching graphics reduce friction for participants who want to share but don’t know how to start.
Monitor your referral program metrics closely during the first few weeks. Track not just the number of participants, but the quality of referrals they generate.
Some participants will refer many people who don’t convert, while others refer fewer people who become highly engaged subscribers.
Recommended Reading: How to Set Up a Referral Program for Your Business in 5 StepsMeasuring Referral Marketing Success
Unlike traditional advertising where you measure cost per acquisition, referral marketing success involves different metrics.
Focus on the viral coefficient (how many new participants each existing participant generates) and the lifetime value of referred customers compared to other acquisition channels.
Most successful prelaunch referral programs achieve viral coefficients between 0.15-0.35, meaning every 100 participants eventually generate 15-35 additional participants through referrals.
While this might seem modest, the compounding effect over several months creates substantial growth.
Track the quality of referral traffic by monitoring how referred signups engage with your prelaunch content.
Referred subscribers often show higher engagement rates and stronger purchase intent than other acquisition channels, making them particularly valuable for launch day conversion.
Expanding Your Advertising Reach: Additional Channels
While Meta and Google form the foundation of most Shopify prelaunch advertising strategies, several other platforms can significantly expand your reach and diversify your customer acquisition approach.
These additional channels often provide lower competition and unique audience access that complements your core advertising efforts.
TikTok Ads: Capturing Younger Audiences
TikTok has emerged as a powerful advertising platform for e-commerce advertising, particularly for brands targeting Gen Z and younger millennial audiences.
The platform’s algorithm favors engaging content over polished advertisements, making it ideal for authentic prelaunch storytelling.
TikTok advertising works best when your content feels native to the platform rather than obviously promotional.
Behind-the-scenes product development videos, founder stories, and user-generated content often outperform traditional product advertisements.
Prelaunch TikTok Strategy:
-
Create authentic content showing your product development journey
-
Use trending sounds and hashtags to increase organic reach
-
Partner with micro-influencers in your product category
-
Test different video formats to identify what resonates with your audience
Budget approximately 10-15% of your total advertising spend on TikTok if your target audience skews younger than 35.
The platform often provides excellent reach at lower costs than Meta, making it valuable for awareness-focused prelaunch campaigns.
Pinterest Ads: Visual Product Discovery
Pinterest functions as a visual search engine where users actively seek inspiration and product ideas.
This intent-driven behavior makes Pinterest advertising particularly effective for lifestyle products, home goods, fashion, and food-related items.
Pinterest users often plan purchases weeks or months in advance, making the platform ideal for prelaunch campaigns that build anticipation over time.
The platform’s longer content lifespan means your ads can continue generating traffic and signups months after creation.
Pinterest Prelaunch Approach:
-
Create visually appealing pins that showcase your product in lifestyle contexts
-
Use rich pins to provide additional product information
-
Target seasonal keywords if your launch aligns with holidays or events
-
Create themed boards that tell your brand story beyond individual products
Pinterest advertising typically requires lower daily budget requirements than other platforms, making it accessible for prelaunch campaigns with limited resources.
YouTube Ads: Long-Form Storytelling
YouTube advertising allows for longer-form content that can fully explain complex products or tell compelling brand stories.
For Shopify stores launching innovative or technical products, YouTube provides the space needed to educate potential customers properly.
YouTube’s targeting options combine Google’s intent-based data with video viewing behaviors, allowing precise audience targeting based on interests, search history, and competitor video views.
YouTube Prelaunch Content Types:
-
Product development documentaries showing your creation process
-
Educational content related to problems your product solves
-
Founder interviews explaining the motivation behind your store
-
Sneak peek videos building anticipation for launch day
Influencer Marketing: Authentic Advocacy
Influencer partnerships can function as a form of advertising that feels more authentic than traditional ads.
Micro-influencers (1,000-100,000 followers) often provide better engagement rates and lower costs than mega-influencers, making them ideal for prelaunch campaigns with limited budgets.
Effective Influencer Prelaunch Strategies:
-
Partner with influencers who genuinely align with your product category
-
Provide early access or exclusive previews in exchange for honest reviews
-
Create unique discount codes to track influencer-driven conversions
-
Build long-term relationships rather than one-off promotional posts
Channel Integration Strategy
These additional advertising channels work best when integrated with your core Meta and Google campaigns rather than operating in isolation.
Use consistent messaging and visual branding across all platforms while adapting content formats to each platform’s unique requirements.
Cross-platform remarketing becomes particularly powerful when you can retarget Pinterest users with Meta ads, or YouTube viewers with Google search campaigns.
This integrated approach reinforces your message and increases the likelihood of conversion.
Budget Allocation Recommendations:
-
Meta Ads: 50-60% of total advertising budget
-
Google Ads: 25-30% of total advertising budget
-
Additional Channels: 15-25% of total advertising budget (distributed across TikTok, Pinterest, YouTube, and influencer partnerships based on audience alignment)
Monitor performance closely across all channels, reallocating budget toward platforms that demonstrate the strongest return on ad spend for your specific product and audience.
What works for one Shopify store may not work for another, making testing and optimization crucial for multi-channel success.
Frequently Asked Questions
How do I get ads for Shopify store setup?
Install the Google & YouTube app from the Shopify App Store to enable Shopping ads directly on your products.
For Meta ads, create an Ads Manager account, install the Facebook pixel on your store through your Shopify settings, and connect your product catalog to Meta Commerce Manager.
Start with prelaunch campaigns before your store goes live, then transition to product-focused advertising after launch.
This approach builds anticipation and ensures you have an audience ready to purchase on day one.
How should I advertise my Shopify store during prelaunch?
Focus on building awareness and collecting email signups rather than immediate sales.
Allocate 60% of your budget to Meta engagement and traffic ads, 25% to Google Ads search campaigns targeting prelaunch keywords, and 15% to referral marketing and other channels.
Create targeted ad campaigns on platforms where your ideal customers spend time, using high-quality creative assets that communicate your upcoming value proposition.
Maintain consistent branding across all advertising channels while adapting content formats to each platform’s requirements.
Which advertising platforms work best for Shopify prelaunch campaigns?
Meta and Google Ads typically deliver the strongest results for most Shopify stores by combining interest-based and intent-based targeting.
Meta excels at building brand awareness and social proof, while Google captures people actively searching for solutions your product provides.
The ideal platform mix depends on your product type, target audience demographics, and whether your focus is awareness or capturing ready-to-buy customers.
Most successful prelaunch campaigns use both platforms complementarily rather than choosing one exclusively.
How much should I budget for Shopify prelaunch advertising?
Effective Shopify prelaunch campaigns typically require a minimum budget of $1,500-3,000 total over 4-6 months for meaningful results.
This breaks down to roughly $300-600 per month, allowing sufficient testing and optimization across multiple platforms.
Costs vary significantly based on industry competitiveness, audience targeting precision, and your specific conversion goals.
Start with smaller daily budget allocations ($15-25 per platform) to test performance, then scale spending toward campaigns that demonstrate strong return on ad spend.
When should I start advertising before my Shopify store launch?
Begin prelaunch advertising 4-6 months before your planned launch date.
This timeline provides sufficient time to build substantial email lists, test different advertising approaches, and gather valuable market feedback that can influence your final product decisions.
Start with engagement-focused campaigns to build social proof and brand recognition, then shift toward conversion-focused advertising as launch approaches.
The final month should emphasize urgency and exclusivity to maximize launch day sales from your accumulated audience.
How do I track the success of my prelaunch advertising campaigns?
Focus on lead generation metrics rather than immediate sales during prelaunch.
Track email signups, cost per lead, engagement rates, and landing page conversion rates across different advertising channels and campaigns.
Use UTM parameters in all your advertising links to identify which platforms and campaigns generate the highest-quality leads.
Quality matters more than quantity—100 highly engaged subscribers often convert better than 500 disinterested signups, making engagement tracking crucial for long-term success.